 Ferndale
 New-Construction Windows Built for Marietta's Marine Climate
Marietta sits close to the water on the edge of Ferndale, and that proximity shapes everything about how a window performs here. Salt-laden air off the bay, wind-driven rain that comes at the building sideways instead of straight down, and a shoulder season that can stay damp and shaded for months all put more stress on a window assembly than most manufacturers' warranty language accounts for. When you're building new, you only get one clean shot at getting the window opening built correctly before siding, trim, and interior finishes cover it up. We install new-construction windows for homes in and around Marietta with that in mind — the goal isn't just a window that looks good on install day, it's an opening that stays dry and sound for decades.
New-construction windows are different from replacement units in a specific way: they have a nailing fin (or flange) around the perimeter that gets integrated directly into the wall's weather-resistant barrier during framing, before siding goes on. That flange is either the best friend or the worst enemy of a wall assembly, depending entirely on how it's flashed. Get it right and water is directed out and away from the framing for the life of the house. Get it wrong and you've built a slow leak into the wall that won't show itself until there's rot to deal with.
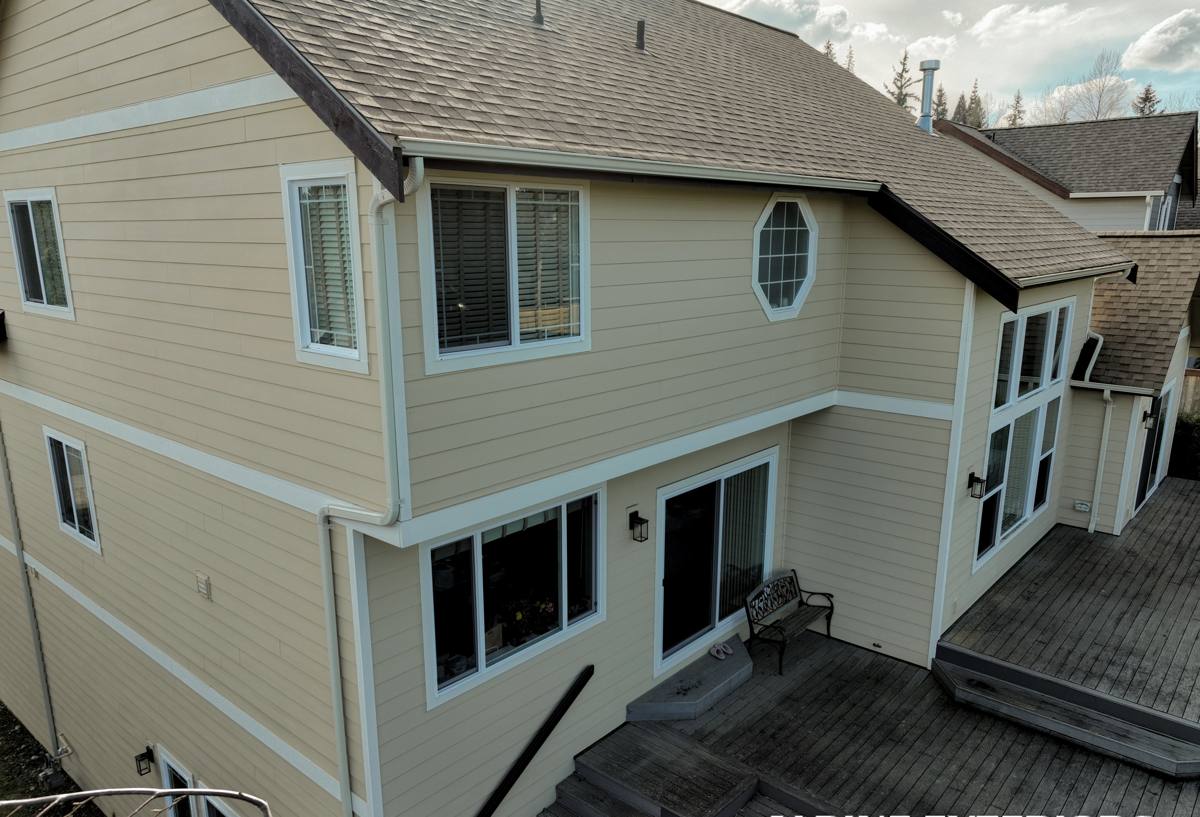
What Marietta's Weather Does to Windows Over Time
Whatcom County's marine exposure isn't subtle, and Marietta's location puts it closer to that exposure than most inland Ferndale neighborhoods.
Salt Air and Metal Components
Salt in the air accelerates corrosion on anything metal — screws, flashing, hardware, and lower-grade cladding. It's a slow process, but it's constant. Windows and flashing components that aren't rated for coastal or marine exposure will show pitting, staining, and eventual failure years before they would inland. This is one of the biggest reasons material selection matters more here than in a drier, inland part of the county.
Driving Rain
Wind off the water doesn't just drop rain on a roof — it pushes rain sideways into wall assemblies, under trim, and into any gap in the flashing sequence around a window. A window that would perform fine in a sheltered inland lot can leak in a Marietta-facing exposure if the sill pan, head flashing, and side flashing weren't installed in the correct shingle-lap order.
The Long Moss Season
Shaded, damp conditions for much of the year mean moss and algae get a foothold on anything that stays wet — window sills, trim boards, and the tops of window heads especially. Beyond the cosmetic issue, sustained moisture against wood trim and sill components shortens their life and can mask early rot until it's already spread. Detailing that sheds water quickly, rather than letting it pool or wick, matters as much as the window unit itself.
What a Correct New-Construction Window Installation Involves
A window is only as good as the opening it sits in. On new construction, the sequence matters as much as the product.
Rough Opening and Sill Pan
Every opening should get a sloped sill pan flashing that directs any water that gets past the window itself back out to the exterior, not down into the framing. This is a step that's easy to skip or do sloppily, and it's invisible once the window and siding are in — which is exactly why it has to be done right the first time.
Weather-Resistant Barrier Integration
The nailing flange has to be woven into the WRB (housewrap or building paper) in the correct order — sill first, then jambs, then head — so that water draining down the wall sheds over each layer like shingles, never behind it. Tape and flashing membrane compatibility with the WRB matters too; not all products bond reliably to all housewraps.
Head Flashing and Kick-Out Details
Above the window, a head flashing (and drip cap where trim profiles call for one) keeps water from running down the face of the wall and pooling at the top of the window frame. Where a roofline or deck meets a wall near a window, a kick-out flashing directs runoff away from the wall entirely instead of dumping it down the siding and into trim joints.
Air Sealing and Insulation at the Perimeter
Beyond keeping water out, the gap between the window frame and the rough opening needs to be sealed and insulated correctly — not overfilled with expanding foam that can bow the frame, and not left with gaps that create drafts and condensation points. This affects comfort and energy performance for as long as the house stands.
Choosing Materials and Glass for This Climate
There's no single "best" window brand or material for every home — the right choice depends on exposure, budget, and how the window will be trimmed out. What we do is steer clients away from combinations that create long-term maintenance headaches in a marine climate, and toward what holds up.
| Frame Material | How It Handles Salt Air & Moisture | Maintenance |
|---|---|---|
| Vinyl | Good corrosion resistance since there's no bare metal exposed; performs well in most Marietta exposures | Low — occasional cleaning |
| Fiberglass | Excellent dimensional stability and corrosion resistance; handles temperature and moisture swings well | Low — very stable finish |
| Aluminum-clad wood | Attractive exterior but relies on cladding integrity and quality hardware to resist coastal corrosion | Moderate — depends on cladding and hardware grade |
| Bare wood exterior | Most vulnerable to sustained moisture, moss growth, and rot in a shaded, damp exposure | High — regular painting/sealing required |
We're candid with clients about this table. A bare wood exterior can still be the right call for a specific architectural look, but it comes with a maintenance commitment that a lot of homeowners underestimate once they're a few Whatcom County winters in. Our standard is to recommend the material that fits the home's exposure honestly, not just the option with the lowest sticker price or the flashiest showroom finish.
Glass Packages
For this climate, we generally steer new-construction clients toward double-pane, low-E glass with argon fill as a baseline, with a focus on a solid condensation-resistance rating rather than just the lowest U-factor on paper. In a damp, shaded environment, glass that resists interior condensation buildup around the edges matters as much as raw insulating value — condensation left unaddressed contributes to the same moisture problems as an exterior leak.
Our New-Construction Window Installation Process
- Plan review and product selection — we look at elevations, exposure direction, and trim details before recommending frame material and glass package.
- Opening preparation — rough openings are checked for square and level, and sill pans are installed before the window ever goes in.
- Window set and flange integration — the unit is set, shimmed plumb and square, fastened per manufacturer spec, and the flange is woven into the WRB in correct shingle-lap order.
- Flashing and sealing — head flashing, jamb flashing, and (where applicable) kick-out flashing are installed, along with appropriate sealant at fastener and flange edges.
- Interior air sealing — the perimeter gap is insulated and air-sealed without over-compressing the frame.
- Final check — operation, weep function, and flashing laps are verified before trim and siding close the opening up.
Energy Code and Performance Considerations
Washington's state energy code sets minimum performance requirements for new-construction windows, and those minimums get enforced at inspection. Beyond just meeting code, we think about how a window's performance holds up specifically in a Whatcom County marine climate — condensation resistance in a damp, cool environment, air infiltration under wind-driven rain conditions, and how the assembly performs through the long stretch of overcast, humid months rather than just on a clear summer day. A window that's technically code-compliant on paper can still underperform in this environment if it wasn't detailed correctly during installation.
Why Hire a Crew That Already Works in Marietta
New-construction window installation done wrong doesn't usually show up as a problem on day one. It shows up two, five, or ten years later as a stain on an interior sill, soft trim, or a mold spot that traces back to a flashing lap installed backward. A crew that's already worked homes in Marietta and the surrounding Ferndale area has seen firsthand how this specific exposure — salt air, driving rain off the water, and a long shaded moss season — actually behaves against a wall assembly, not just how it's described in a manufacturer's install manual. That local experience shows up in the details: which exposures need extra attention at the head flashing, which trim profiles shed water well here and which ones trap it, and where kick-out flashing gets skipped on cheaper builds and causes problems later.
We also coordinate directly with builders and framers on new-construction timelines, since window installation on a new build has to slot into the schedule at exactly the right point — after the WRB is up, before siding starts. Showing up on time and doing the flashing sequence correctly the first time avoids callbacks, schedule delays, and rework that nobody wants to pay for.
New-Construction Window Installation Checklist
- Rough openings checked for square, level, and correct dimension before any window is set
- Sloped sill pan flashing installed at every opening, no exceptions
- Nailing flange integrated into the WRB in correct shingle-lap order (sill, jambs, head)
- Head flashing and drip cap installed where trim details call for one
- Kick-out flashing installed at any roofline or deck intersection near a window
- Frame material and glass package matched to the home's specific wind and moisture exposure
- Perimeter gap air-sealed and insulated without distorting the frame
- Operation and weep function verified before trim and siding close up the opening
If you're building new in Marietta or elsewhere around Ferndale, we'd rather walk your plans and talk through the right window and flashing approach for your specific lot and exposure than sell you a one-size-fits-all package. Reach out for a free, no-pressure estimate — use the form below to get started.